Add the Convenience of Sitting While You Bathe
Walk-in showers are great because you can, well simply walk in and take a shower but it would also be nice if you could sit down while enjoying a good soak.
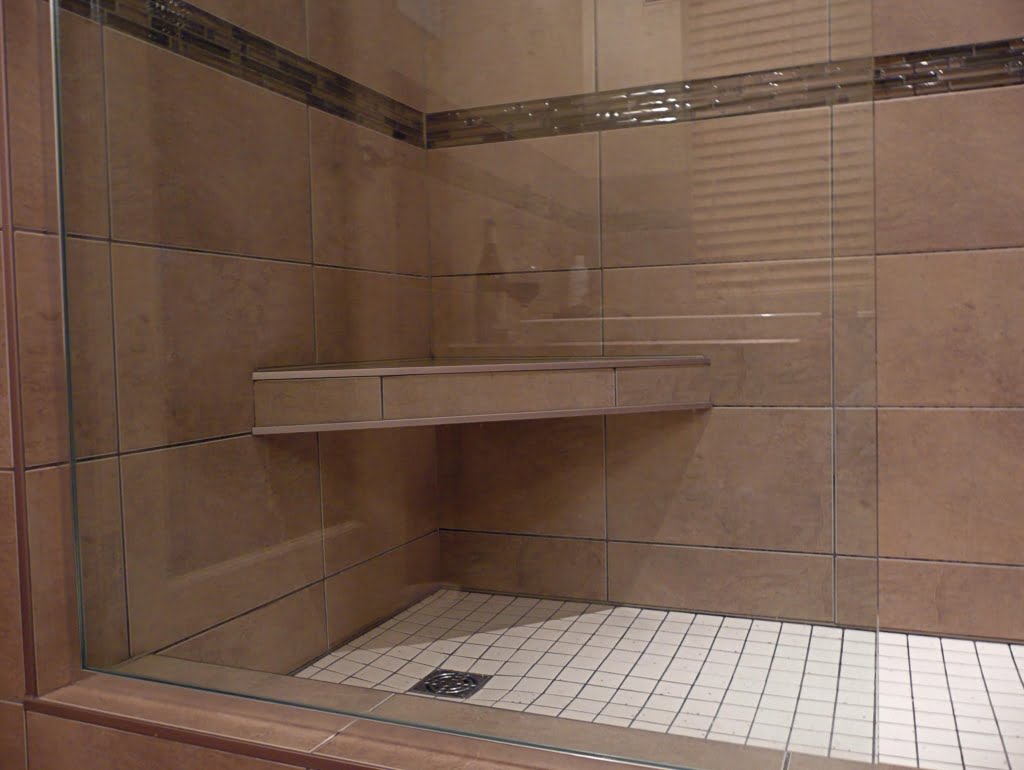
Installing a corner ceramic shower seat in your bathroom is not only a great convenience, but it is also an attractive installation where you can sit while you enjoy a refreshing steam bath or it can be used as an easy to reach storage ledge for your bathroom accessories.
There are many portable plastic shower seats you can buy but if you want a more permanent solution that blends into your current shower wall tile, then a custom installed shower seat is the way to go and can be bought at any specialty tile shop.
Currently, with your shower seat kits, you have the option of installing the seat before you install any ceramic tile or you can purchase a kit that you install over your existing tile. As in the latter case, the wall tile should sit on top of your seat just as it would sit on the top edge of a bathtub.
These kits are great because you don’t have to install a PVC waterproofing membrane within the wall framing. You don’t have to build your own frame, rip out any tile or unnecessarily tear open your shower wall.
Corners Offer a Simple Space Saving Option
A corner shower seat kits usually include a triangular aluminum pan that you fastened directly to your existing tile wall. This pan is then filled with mortar and covered with matching the ceramic tile. Just remember to lay the top-surface tiles first, then the seat edge tiles next.
You also want a slight pitch in the seat towards the center of the shower as this allows water to drain effortlessly off the seat.
While you can install a seat in a 42-inch long shower, a slightly bigger enclosure would give you a little more leg room. First, determine where you want your shower seat to be. A seat height of about 16 to 20 inches above the shower floor provides the greatest comfort and versatility. The only prerequisite is to make it attractive and waterproof.
In this article on DIY Corner Ceramic Shower Seat Installation Tutorial, we will show you how to install the shower seat.
How to Install a Tiled Corner Shower Seat
In the first part of this article, we talked about the pros of installing a more permanent solution in your shower enclosure. Now we will discuss the materials and procedures for installing your brand new ceramic shower seat.
You have already decided where you want it to go now, let’s get on with what you will need to get the job done and the skill set you will need.
The materials you will need are:
- a shower seat kit
- soft cloth and sponge
- tiles and masonry mortar mix
- grout and silicone caulk
- latex mastic or thin-set mortar
The tools you will need, you can acquire at any local home improvement or hardware store. Some you may even have kicking around your home already.
You will need masking tape, a felt tip marker, screwdriver, and a drill. Some additional items you may have to purchase are 3/8 inch diameter carbide-tip masonry drill bit, tile cutter, mortar trowel, rubber float and a trowel with 1/8 inch notches.
To begin, hold the metal pan in place on top of a strip of masking tape and mark off the screw holes on the tape with your felt tip pen. (Tip: the tape keeps the drill from slipping on the slick tile while you drill).
Drill through the marks using a 3/8 in diameter carbide-tip masonry bit then remove the tape. Next, insert the hollow-wall screw anchors that came with the seat kit halfway into the holes in the tile.
The way it works is as you tighten the screws, the anchors slowly open, attaching the seat firmly to the tile wall. This is important: to create a waterproof seal, dab silicone caulk generously around each anchor head to keep out any moisture then push the anchors all the way in to complete the seal.
Next, we attach the metal pan. So, as you are holding the metal pan in position on the wall, put the screws through the holes in the metal pan and into the wall anchors at which point you need to tighten the screws in the wall anchors to firmly secure the seat pan to your tile wall.
And to seal the deal so to speak, apply a thin deposit of silicone caulk along the top frame of the aluminum bench.
Now comes the slightly messy but fun part, mixing the masonry mortar by following the supplier’s directions. Then using a trowel, pack the mortar compactly into the triangular frame until it pushes its way out the holes on the face of the seat frame then smooth it all down.
Setting the Seat in Place
Once this is done, apply a slightly wetter thin layer of mortar onto the front edge. Now the mortar must cure for at least twenty-four hours before we can proceed any further.
You can be creative with this part, or you can go the conventional route. Cover the top face of your bench with a tile color that matches the rest of your shower walls, or you can get more creative and use solid-surface materials or even a slab of stone.
It’s usually best to either have the top or the front surface of your bench match your tiles to create unity in the design.
Ok, let’s get on with it, dry lay (without mortar) a full tile in the center of the bench and allow it to hang over the front facing edge by about ¼ of an inch then proceed to lay the remaining tiles, continuing out in all directions to the back and corners.
Using your tile cutter, trim the tiles that go against the walls then reposition (dry-lay) them to around the full tiles to make sure everything fits nicely.
Once this is confirmed, displace all the tiles temporarily and spread thin-set mortar or premixed latex mastic on the top and front of your shower bench using a 1/8 inch notched trowel.
First, lay in the top tiles first and then finish with the edge tiles making sure to press firmly and let it dry overnight. When dried the next day, squeeze grout into the joints using a rubber float.
It is very important that you press firmly forcing the grout into every crevice to seal out any moisture. Let this set for about a half an hour then using a damp (not soaking wet) sponge, wipe off any excess grout on the tile surface.
When the grout is dry, buff the surface of the tile with a shammy or soft cotton cloth and allow the grout to set for another twenty-four hours. Almost there! As a final waterproof insurance measure, bead a thin line of silicone caulk around the border of your new ceramic tile shower seat.
Just let the caulk dry for another six to eight hours, and you are ready to enjoy your new shower seat.